Tailscale: Simple Remote Access for Your Homelab (Without the Headache)
As I and many other Homelab enthusiasts have found time and time again, accessing your home network when you're not at home securely, safely and consistently can be hard, if not impossible.
Early on in my Homelab journey, I did things like Port Forwarding on my router with a free Dynamic DNS but security wasn't my first thought. I was young and naive. I mean what's the worst that could happen.
All it would take it one open port I forgot about or leaving default credentials on a service I wanted to access remotely to open up my whole network to snooping or even scarier a full on takeover from the inside.
That’s where Tailscale comes in.
Instead of opening your network to the internet, Tailscale creates a secure private tunneled network like a personal VPN between all your devices.
No need to have access to the router so I can use it on any network or open ports to keep track of.
With a flick of a switch in Tailscale app on my phone or my laptop I can access what I need without any worries.
We'll be
- Looking at What Tailscale is
- Seeing why it's the perfect fit for a Homelab
- Installing Tailscale on Linux via SSH to connect our Homelab
- Setting up a Tailscale Account and Devices
- Setting up access to extend to your whole network using subnet routing
- Setting up Custom DNS with Tailscale for all your devices to use it
- Disabling Key Expiry for the node to use without reauthentication
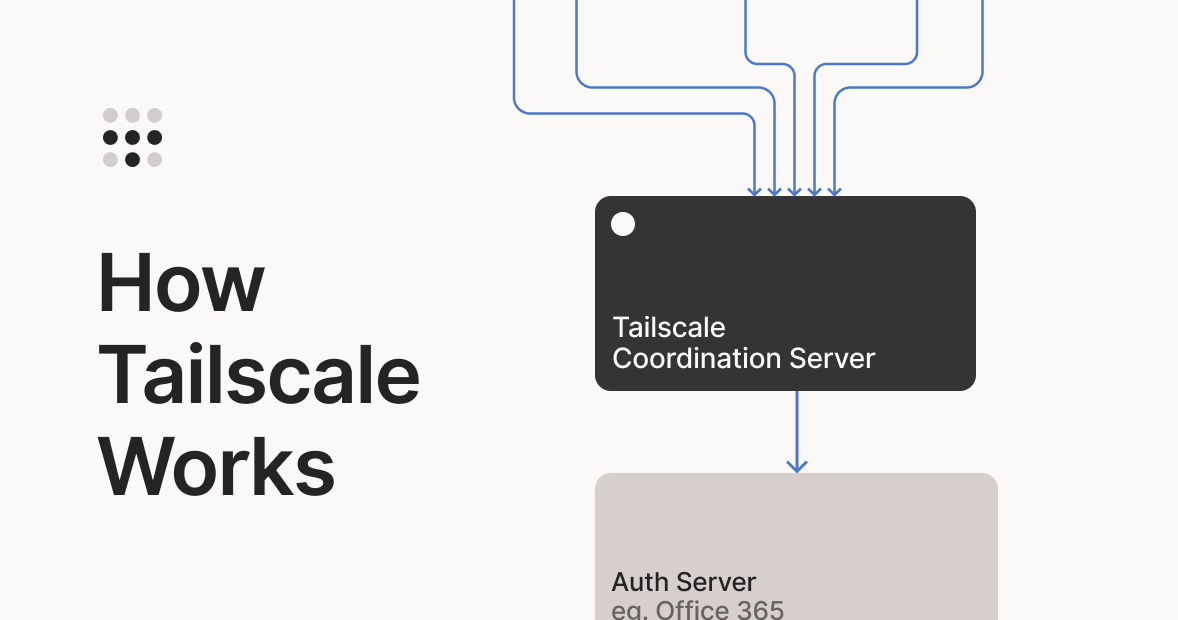
What is Tailscale?
At a basic level, Tailscale is a Mesh VPN.
From the Tailscale website in a bit more detail,
"Tailscale creates a peer-to-peer mesh network (known as a tailnet). However, you can still use Tailscale like a traditional VPN by routing all traffic through an exit node." - Tailscale.com
That just means:
- Every device connects securely to every other device using tailnet
- They behave like they’re on the same local network
- You can access things as if you were at home on any network
This lets your laptop, phone, server and Raspberry Pi all talk to each other even if they’re on completely different networks.
Why It’s Perfect for a Homelab
For a Homelab setup, this solves a lot of networking problems instantly:
- No more exposing services to the internet
- No need to mess with router configs
- This works behind CGNAT (this was one of my first use cases)
- Securely access everything on your network from anywhere
It’s one of those tools that you install once and then wonder why you didn’t sooner.
You can visualise all of your current connections from an onboard dashboard to check your current machines on the tailnet and activate or disable features here as well.

I've been using it since the end of 2022 and it's really been a secret weapon in being able to fix issues at home from anywhere.
Installing Tailscale
The best way to take advantage of Tailscale to connect back to your own homelab is to install this on something like a Raspberry Pi.
I installed on a Raspberry Pi and a Debian DietPi VM for some redundancy both using the Linux install.
That installs everything you need in one go.
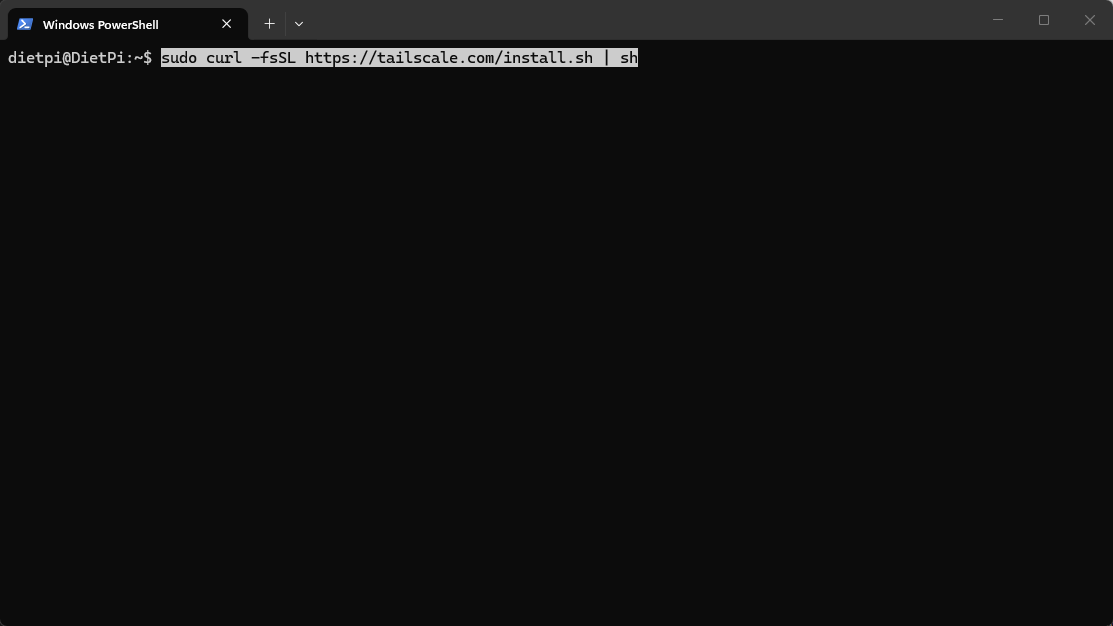
To install on Linux
The easiest way to install on Linux us to use the installation script from Tailscale directly in your terminal.
- SSH into your Linux machine

- Run the below curl command for the installation script
sudo curl -fsSL https://tailscale.com/install.sh | sh
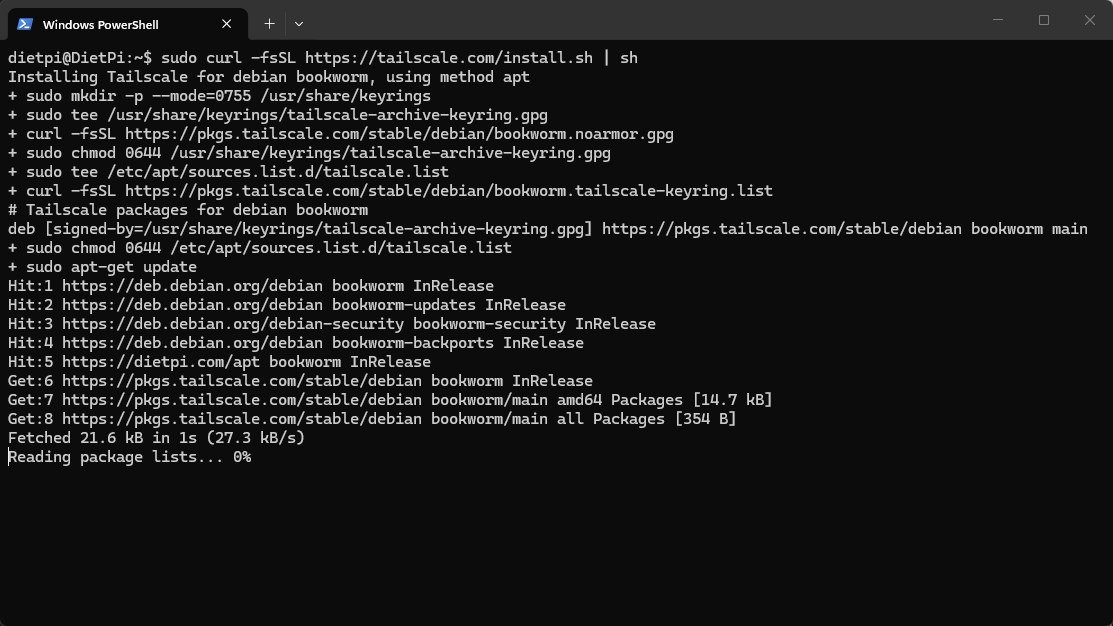
- Wait for Tailscale to install all the dependencies it needs to run
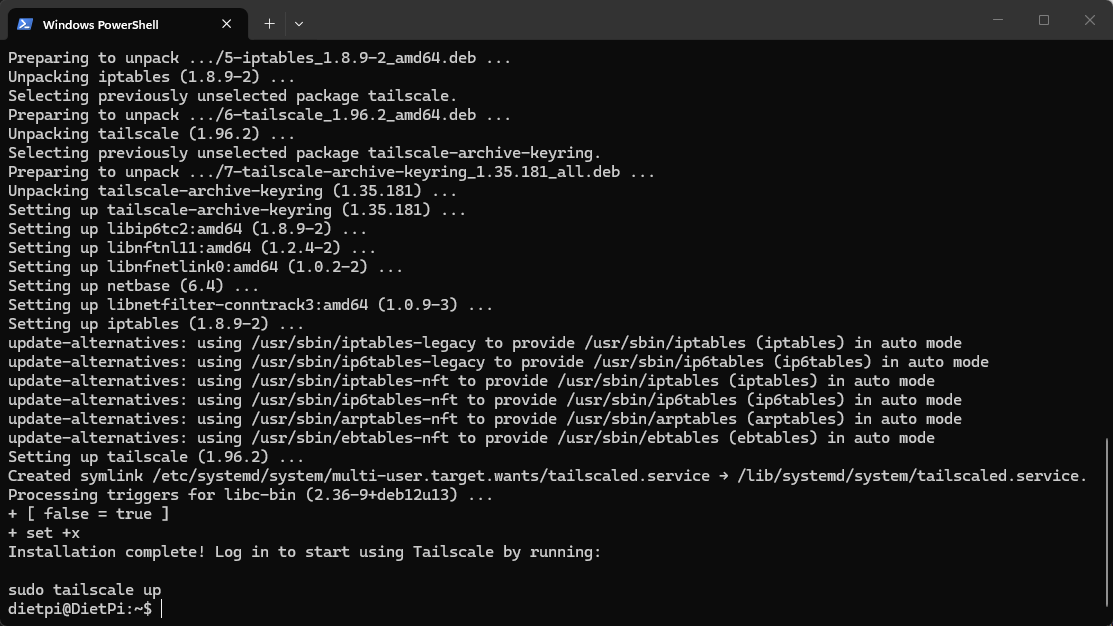
With the installation complete. We are now ready to use this device to create and connect to our first tailnet.
Connecting Your First Device
Once Tailscale has been installed on a device, we need to bring it online:
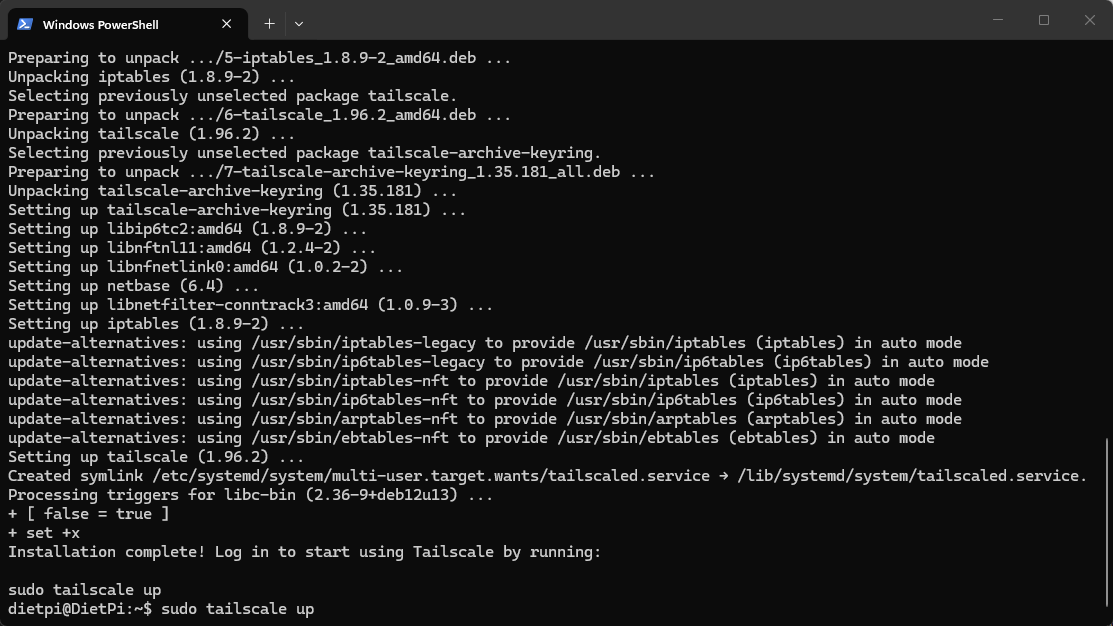
We can use the below command to bring up this node up
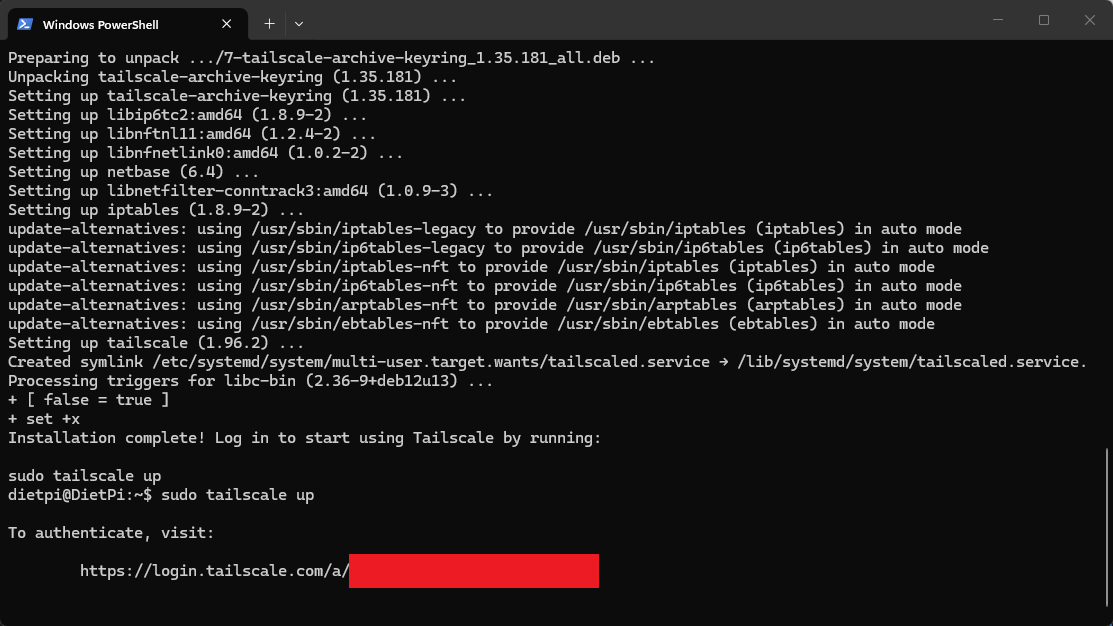
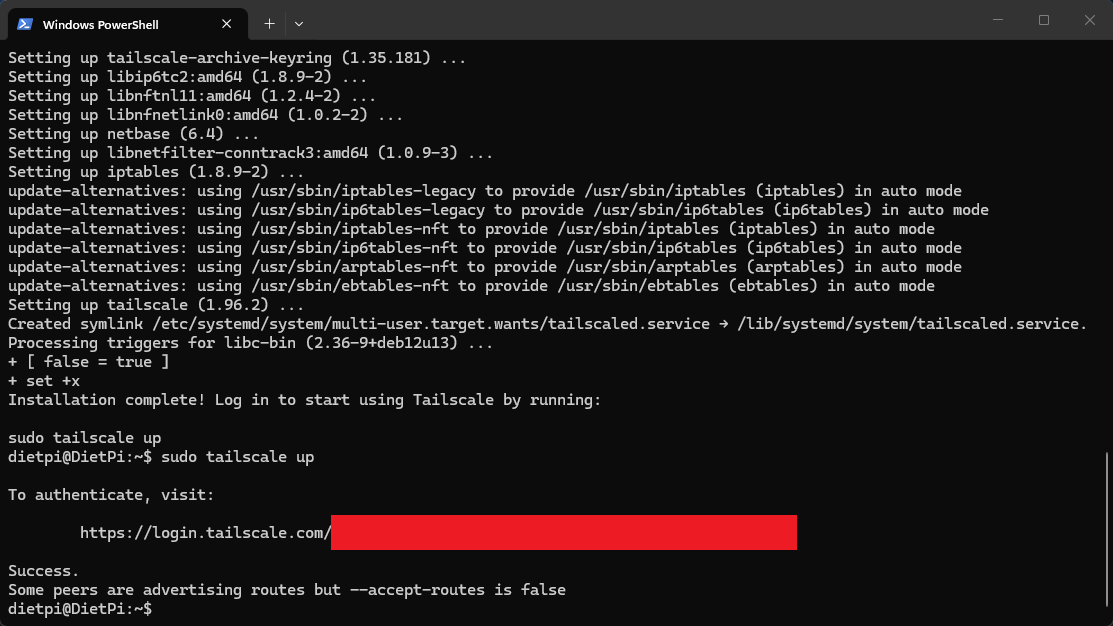
sudo tailscale up
As this is the first time that you are using this command and bringing your device online then you’ll get a unique login link in your terminal.
- Copy this into a browser and you'll need to login using SSO (Single Sign-On) from one of the below methods.
You can use:
- Microsoft
- GitHub
- AppleID
- OpenID Connect
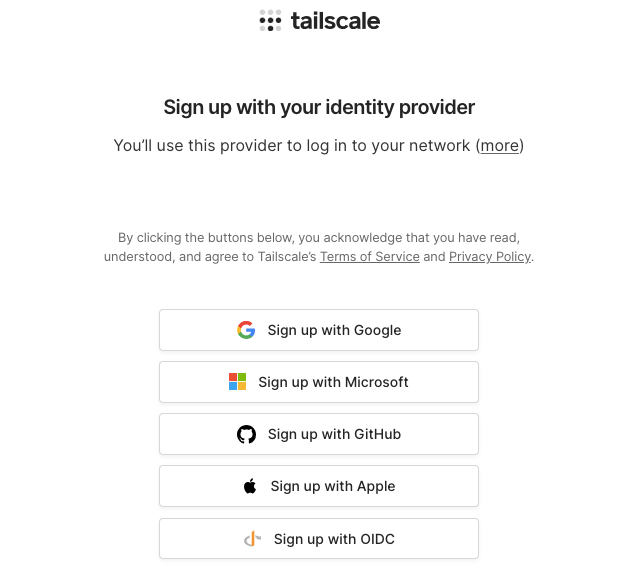
I use GitHub but any of them will work as long as you have an account with them and can log in.
Once you're logged in you should see a success message in the terminal to show that the device is now logged in using those credentials to Tailscale.
You should only have to do this once per machine and once you have we can move onto some extra features we can now activate.
You'll also see it show up in your Tailscale Admin Portal in browser as well and it should show as connected with the hostname

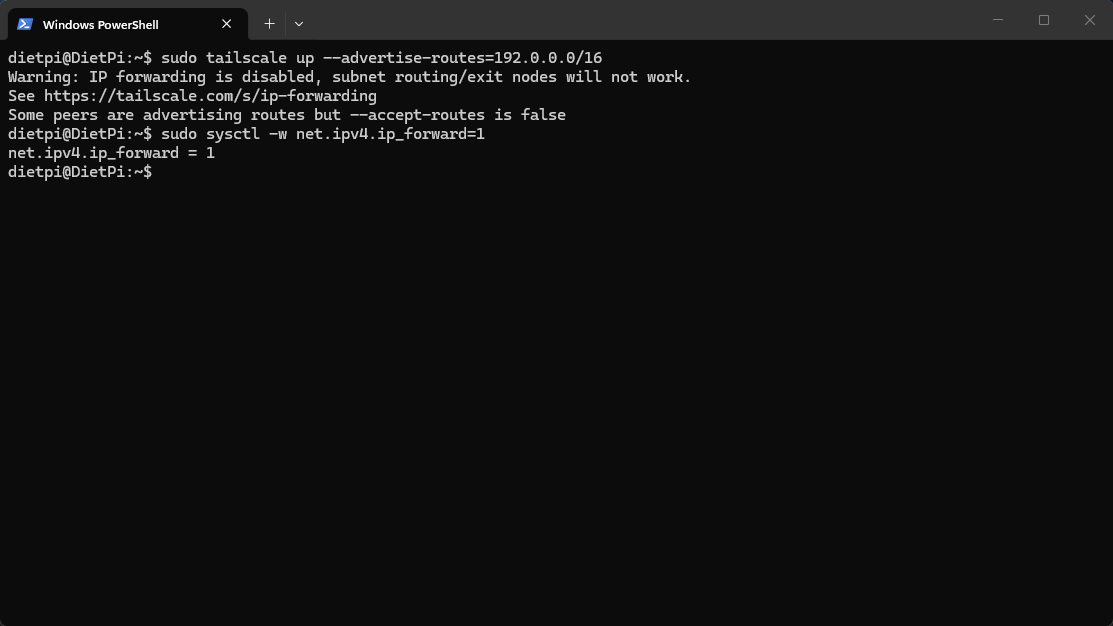
If you already have Tailscale set up on your network like I do then you may get the error about peers advertising routes or not yet accepted.
Next up, we're going to set up advertising some subnet routes on our network using this new node.
Extend your Tailscale To Access Your Entire Network
By default, Tailscale gives you access to the device you installed it on, from anywhere.
But in a Homelab, you usually want to be able to access everything on your network as if you were there.
You may want to check in on your NAS, Docker hosts or other VMs while you're not at home in a rock solid way.
This is where subnet routing comes in.
We're going to slightly change the command we used to bring up Tailscale on this device to add extra features to the network we're using.
- SSH in like normal and then run the below command
sudo tailscale up --advertise-routes=192.0.0.0/16
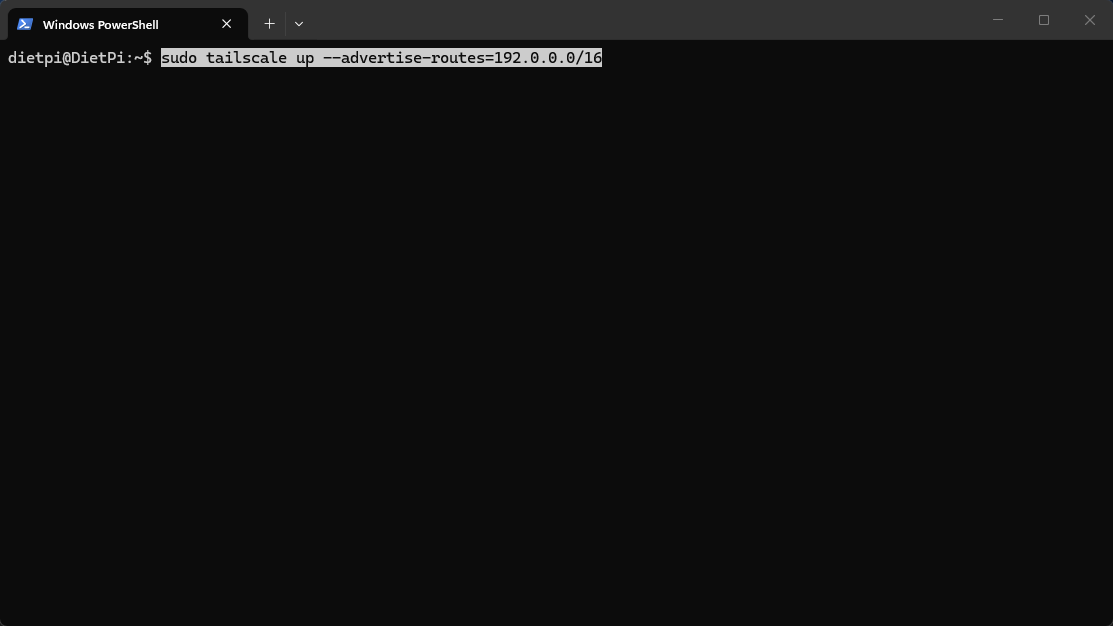
- Replace that subnet with your own or use 192.0.0.0/16 and for most networks this should cover a default subnet setup.
This turns your machine into a relay node for your whole network.
Now any device connected to Tailscale can access your entire internal subnet with ease.
If You Can't Get Your Tailscale Up
If that command throws errors, it’s usually IP forwarding not being enabled.
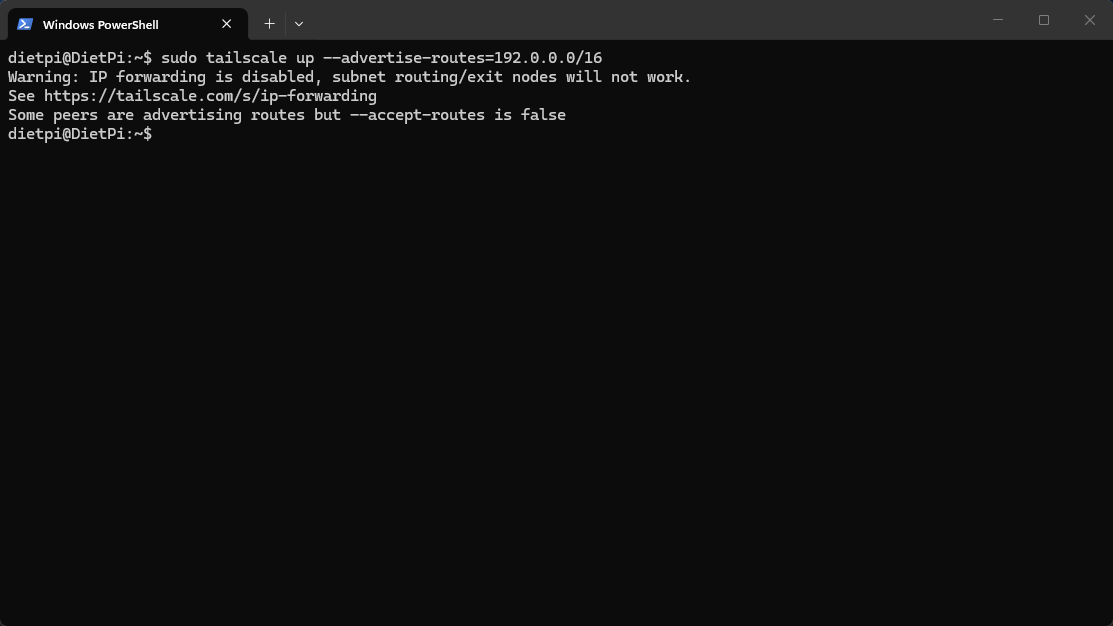
- Enable it with:
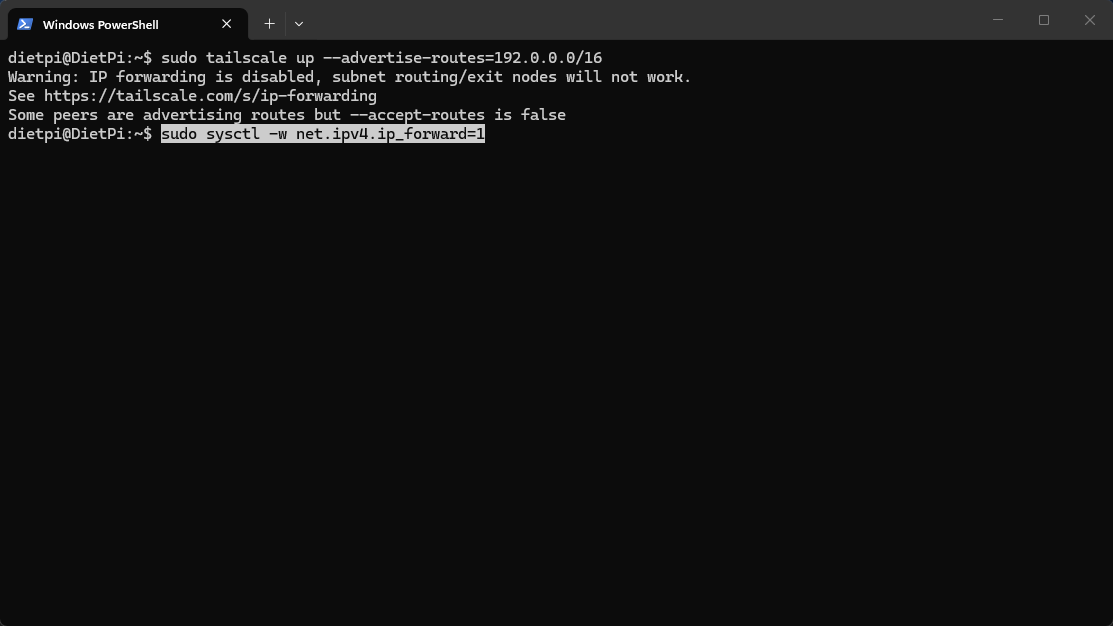
sudo sysctl -w net.ipv4.ip_forward=1
- Then try again.
- Once this has been set, open the Tailscale Admin Portal and this will now show a new icon beneath the credentials name called Subnets.
- This shows that subnets have now been added. We have one final step before this setting is activated and we need to do this on the Tailscale Admin Portal in browser.

- Click the 3 horizontal dots to the right of the machine to open up the Menu for that node.

- Click Edit route settings... and this will open a window which should show the subnet route advertised but not yet approved. The route will be unticked to show this

- Check the subnet route is correct and then tick the box.
- We can ignore the Exit node option for now as that will stay greyed out in this example.
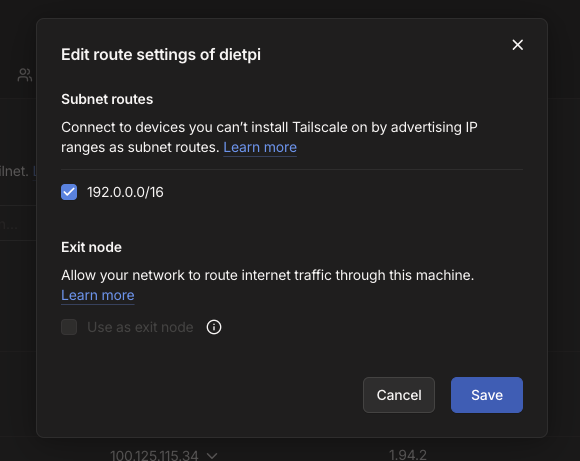
- Once you've checked and ticked the Subnet route you can click the Save button here to approve and use this machine to map this subnet route in your Tailnet
Allowing Other Devices to Use It
On your other Linux devices on the same network:
- We'll accept the existing routes on here just as an example so it uses the existing subnets we already have set up
sudo tailscale up --accept-routes
Once enabled, they’ll be able to reach your internal network through your relay node from any of the other machine
What about DNS?
As your network grows then accessing services via IP address can become quite cumbersome and an overall drag.
Instead of:
http://192.168.0.127:3000
You want:
http://grafana.home
You’ve got two options you can try before you go too crazy.
Option 1: Use Pi-hole (More Granular Control)
If you’re already running Pi-hole, you can set it as your DNS server in Tailscale.
This gives you:
- Custom domain names for your services
- Centralised DNS control
- Built-in ad blocking
Let's set this up now
- Open up the Tailscale Admin Portal in browser and click the DNS tab at the top
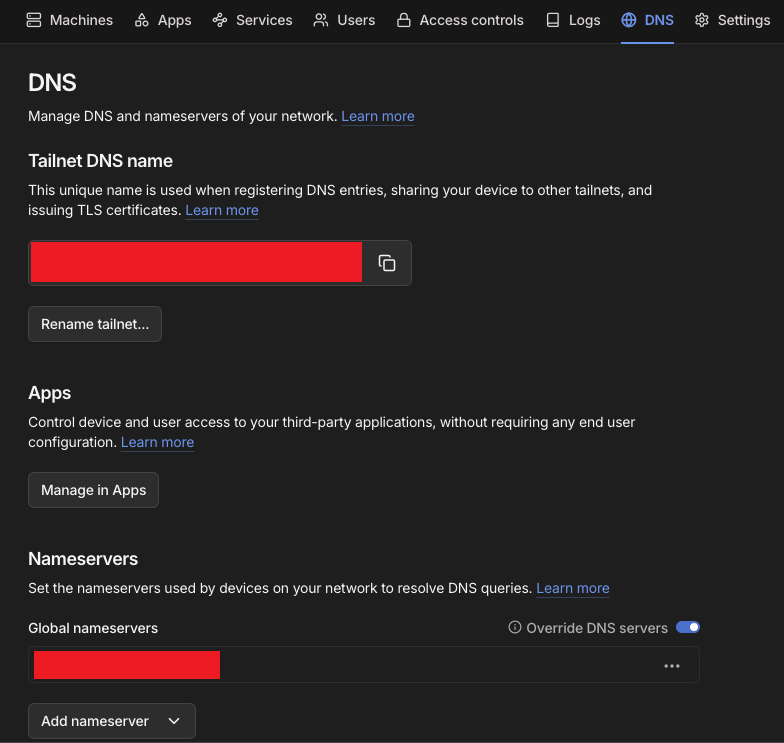
- To set your nameserver you can click Add nameserver to bring up a menu to allow you to set these to either an external DNS or your own custom
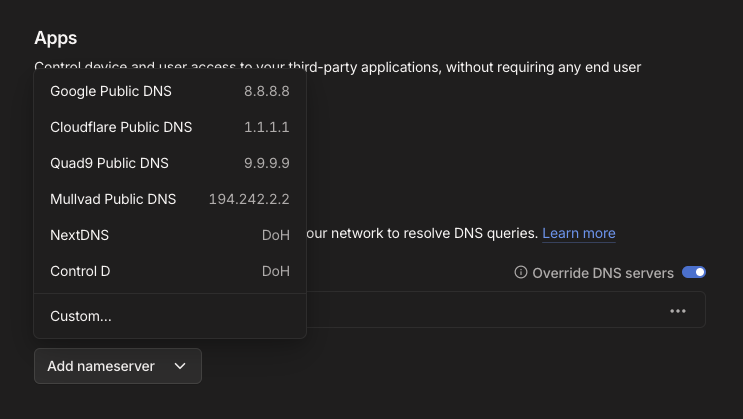
- Just set your local DNS IP address to the Pi-Hole here in Add Nameserver and it'll make sure to use that for your DNS requests while remote.
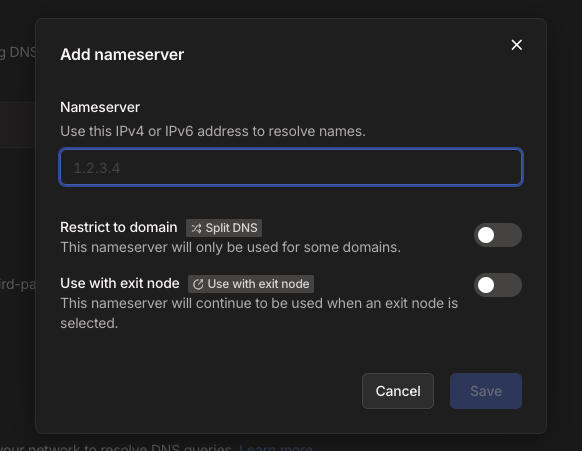
- Make sure the Override DNS Servers button is toggled on. It will only let you switch this on once you've set a custom one or one of the other ones in built.
- Turn on Tailscale, and everything just resolves properly which ever device you are using.
I'm using this setup myself and as a bonus it also gives you Pi-hole DNS blocking while you're on any public network too.
While at home I also use the Tailscale app on my MacBook or Windows Laptop to quickly connect to my Pi-Hole DNS in conjunction with Nginx Proxy Manager from my previous guide.

Using the Tailscale app, it's a quick switch on and off when I need it instead of digging into my DNS settings every time. Especially on the MacBook.
Option 2: Use MagicDNS (Built In)
Tailscale also includes MagicDNS, which works out of the box.
Each device gets a hostname like:
server-name.tailnet.ts.net
No setup required.
It's something we may expand upon in another article but it's a very quick way to get other machines on your tailnet using their machine name automagically.
This link to the official Tailscale Magic DNS documentation give much more detail on this so it's worth a read if you want an alternative way to do this.
What about Key Expiry?
Finally, once you've set up your node as you want it then you need to think about the Key Expiry as by default these nodes will need to be authenticated every now and then.
If you trust the node and device that you're setting up then you'll need to Disable Key Expiry
- Open up the Tailscale Admin Portal and click the 3 dots and this time click the Disable key expiry option
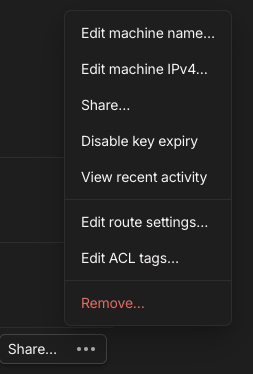
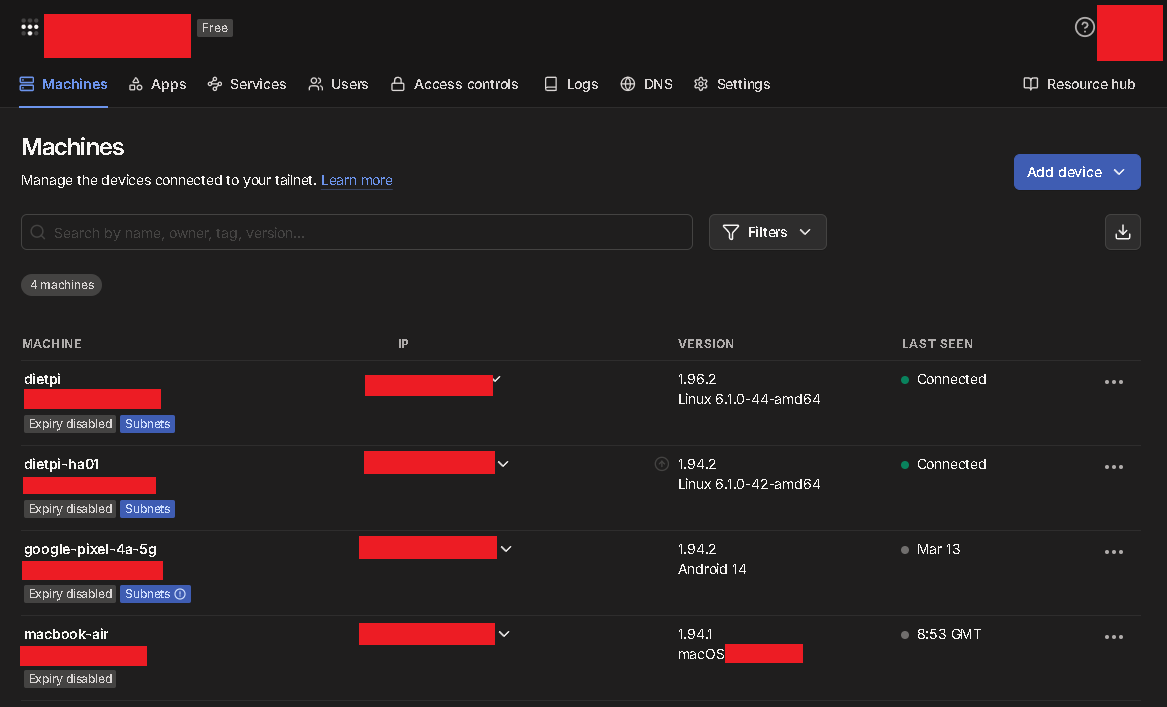
- This will then show in the list that Expiry has been disabled so you won't need to worry about this expiring without you knowing.

- Your Tailscale Admin Portal will look something like this but without all the red bars of course.
What this means for you?
At this point, your device is now part of your private Tailscale network.
You can:
- SSH into it from your laptop remotely
- Access services running on it
- Connect from your phone while on mobile data remotely
And you haven’t opened a single port.
Congratulations you're now a Tailscaler
You've configured a Tailscale Mesh VPN in your Homelab network so you can connect from any network remotely.
You may have also just set your DNS to be Pi-Hole or Google by doing this and given yourself a much smoother surfing experience.
For most people just installing Tailscale on a spare bit of hardware and using it as a way to connect back to their home machines can change the way they view their janky home infrastructure.
When you can securely and consistently connect home without much friction and from any network it allows you to run a whole heap of self hosted services that you want to keep under your control and not just fully open to the wide internet.
Things like Self hosted Password Managers and Budget Apps can be accessed with a bit more peace of mind remotely when you can secure the internet route home.
You can still layer things like reverse proxies or further SSO authentications methods on top if you want to but this is a great starting place.
Don't forget to explore the rest of our website as we build out more content. Stay tuned for more tutorials, tips, and tricks to help you make tech work for you.
If you want to stay up-to-date with regular updates, make sure to subscribe to our free mailing list.