Decoupling Docker Configs: Moving AppData to NFS Without Breaking SQLite
Decouple Docker Configs: AppData to NFS & SQLite Guide
How I migrated my Docker container configs (AppData) from a local VM disk to an OpenMediaVault NFS share, standardizing my storage backend, and the critical distinction between stateless configs and active databases.
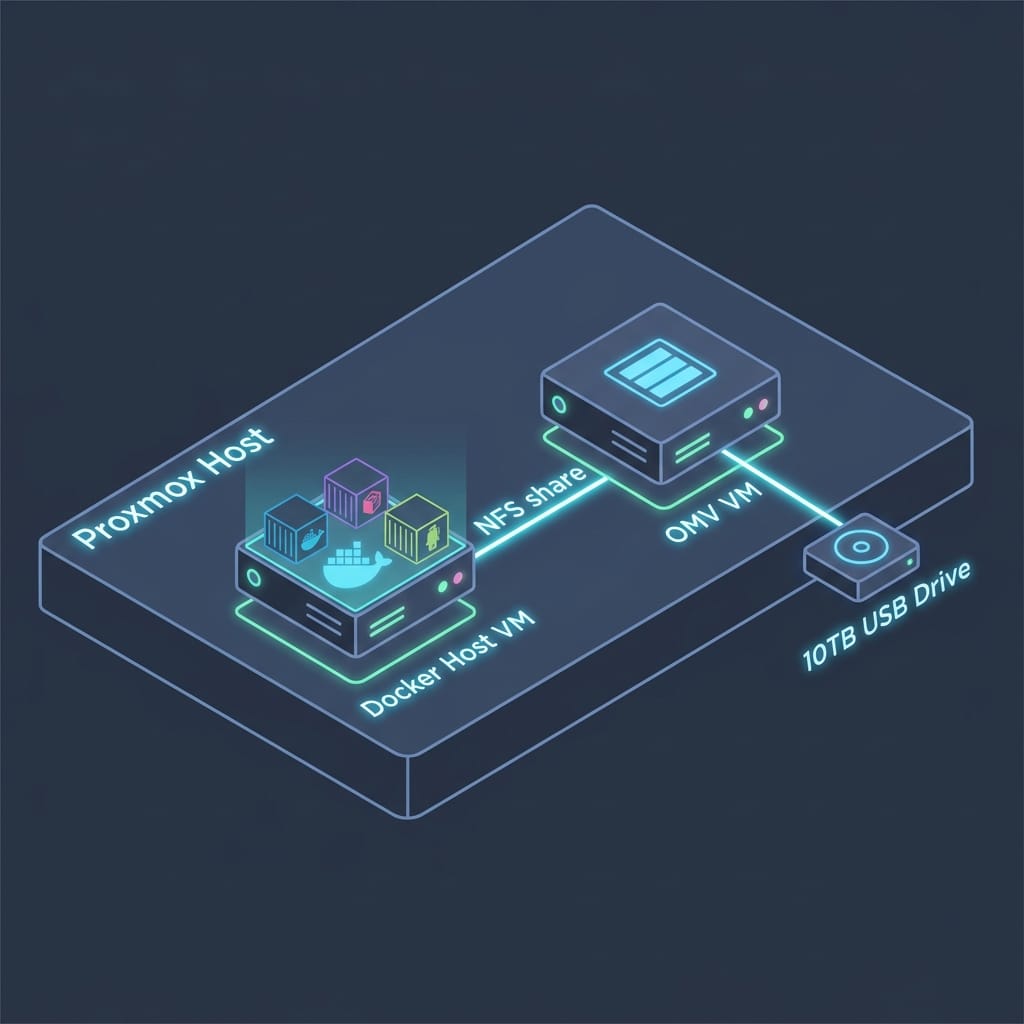
A Note on Hypervisor Topology: Currently, my OpenMediaVault (OMV) storage server runs as a virtual machine (VM) co-located on the same physical Proxmox VE host as the Docker VM (ZuluServer). While this keeps things consolidated for now, the long-term roadmap is to migrate OMV onto dedicated physical bare-metal hardware. This will isolate the storage plane entirely, reducing hypervisor resource contention and ensuring my NFS shares remain available even when the Proxmox host goes down for maintenance.
The Next Milestone
In Part 1: From USB to NFS, I detailed how I migrated a 10TB external media drive out of my primary Proxmox VM (ZuluServer) and attached it to OMVNAS (OpenMediaVault), serving it back over NFS. That change successfully made the VM "stateless" for heavy media content. In [Part 1: From USB to NFS], I detailed how I migrated a 10TB external media drive out of my primary Proxmox VM (ZuluServer) and attached it to OMVNAS (OpenMediaVault), serving it back over NFS. That change successfully made the VM "stateless" for heavy media content. In [Part 1: From USB to NFS], I detailed how I migrated a 10TB external media drive out of my primary Proxmox VM (ZuluServer) and attached it to OMVNAS (OpenMediaVault), serving it back over NFS. That change successfully made the VM "stateless" for heavy media content. In [Part 1: From USB to NFS], I detailed how I migrated a 10TB external media drive out of my primary Proxmox VM (ZuluServer) and attached it to OMVNAS (OpenMediaVault), serving it back over NFS. That change successfully made the VM "stateless" for heavy media content.
However, my ultimate goal was to make ZuluServer a 100% disposable node. If the VM’s virtual disk crashed, I wanted to be able to spin up a fresh OS template via Terraform, run Ansible to bootstrap Docker, pull my GitOps repo, and restore my entire self-hosted stack in under five minutes.
That was impossible while my container configuration files (appdata/config) still lived on the local local NVMe storage of the VM.
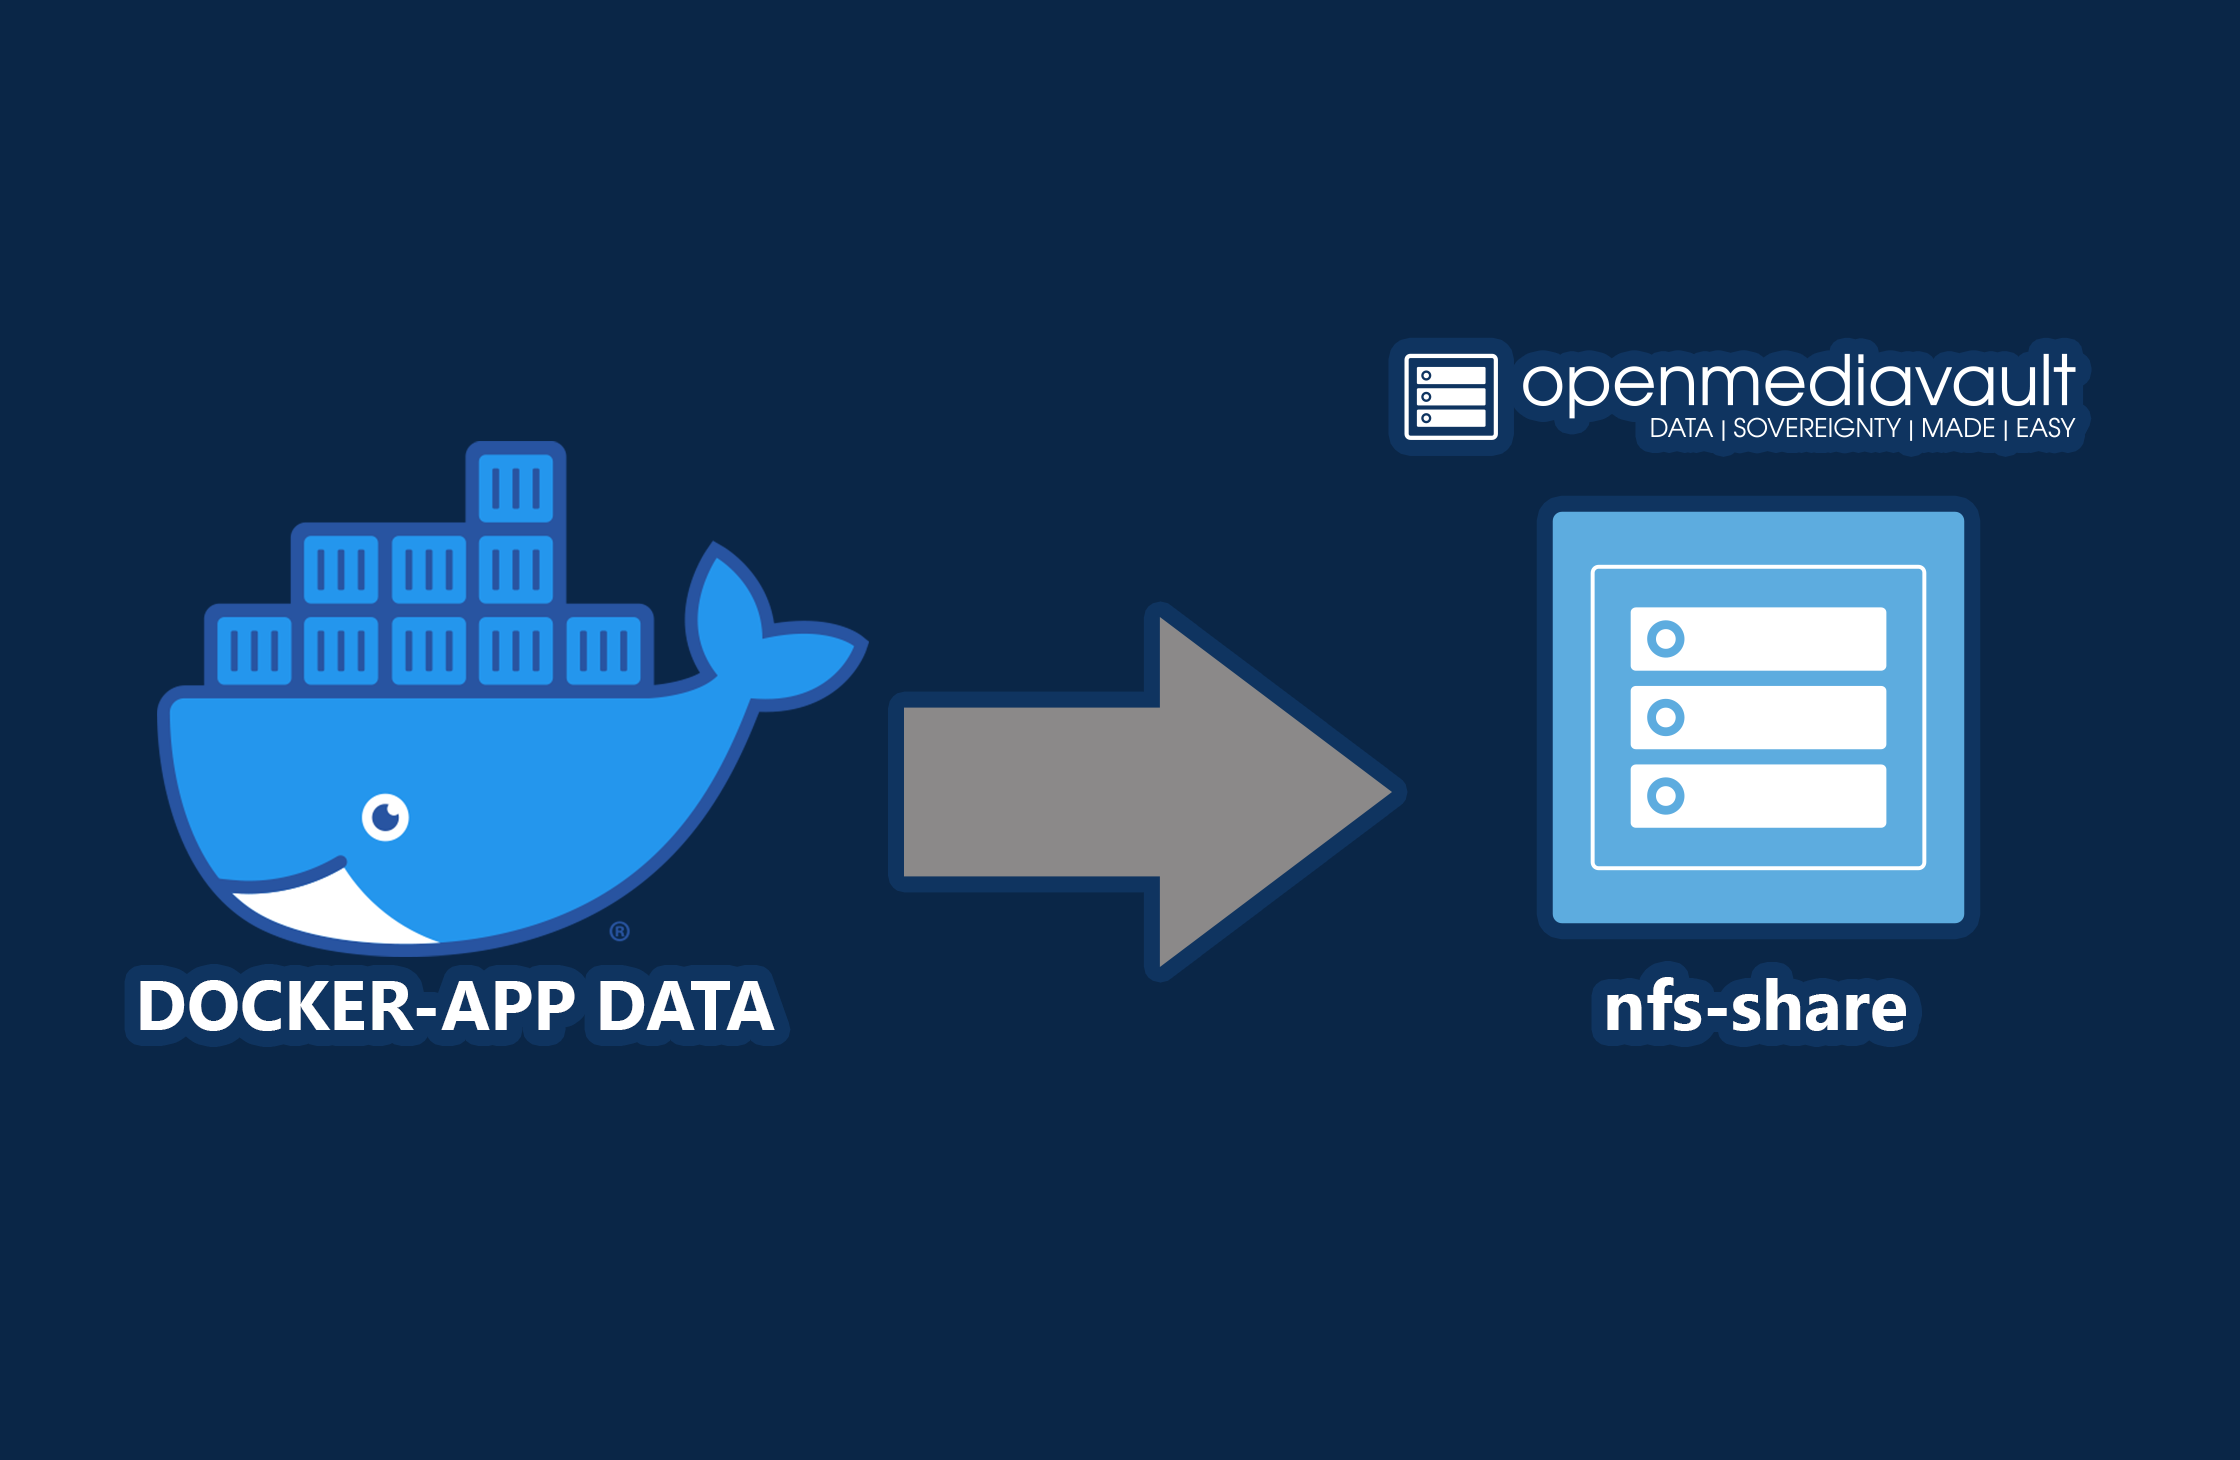
The next phase was clear: decouple container configuration directories (/appdata/config) from ZuluServer's local disk, move them to a centralized network share, and mount them back over the LAN.
But this phase introduced a brand-new engineering challenge: managing file permissions and avoiding network database corruption.
The SQLite / Database locking Gotcha
In a self-hosted environment, containers generally fall into two categories:
- Stateless / Read-Heavy: Services that parse text configurations, static files, or template files (e.g. dashboards like Homepage and Dashy, or developer tools like code-server).
- Stateful / Database-Heavy: Services that actively read and write transactions to database engines (e.g. Vaultwarden, Uptime Kuma, Nginx Proxy Manager, or the Arr suite, which write to SQLite or PostgreSQL).
This distinction is critical when using network shares like NFS or SMB.
NFS and SQLite do not mix well. SQLite relies on POSIX advisory locks to manage concurrent writes. NFS has historically buggy or high-latency lock implementations (specifically with lockd and statd). If an application tries to write to a SQLite database located on an NFS share during a network hiccup or high-concurrency event, the locks will fail, resulting in:
- Slow, sluggish container performance
- UI freezing
- Frequent
database is lockedfatal errors - Severe database corruption
Because of this, I split my container migration plan into two phases based on risk:
| Candidate | State Type | Risk Level | Strategy |
|---|---|---|---|
homepage, dashy |
Text/YAML configs | 🟢 Very Safe | Migrate to NFS |
code-server, cleanuparr, dispatcharr, huntarr |
Text/JSON configs | 🟢 Very Safe | Migrate to NFS |
flaresolverr, nzbget, iplayarr |
Logs/Settings/Redis | 🟢 Very Safe | Migrate to NFS |
uptime-kuma, nginx-proxy-manager |
Active SQLite DBs | 🔴 High Risk | Keep Local (Backup Loop) |
pulse (monitoring) |
High-I/O SQLite DB | 🔴 High Risk | Keep Local (Backup Loop) |
linkwarden |
Active PostgreSQL | 🔴 High Risk | Keep Local (Backup Loop) |
tubearchivist |
Elasticsearch / Redis | 🔴 High Risk | Keep Local (Backup Loop) |
By keeping database-heavy configurations local to the VM’s virtual NVMe disk and moving the other 9 safe containers to the network, I got the best of both worlds: maximum database IOPS and sub-millisecond latency, while standardizing my dashboard and tool configs on network storage.
Setting Up the zulu-docker-data Share
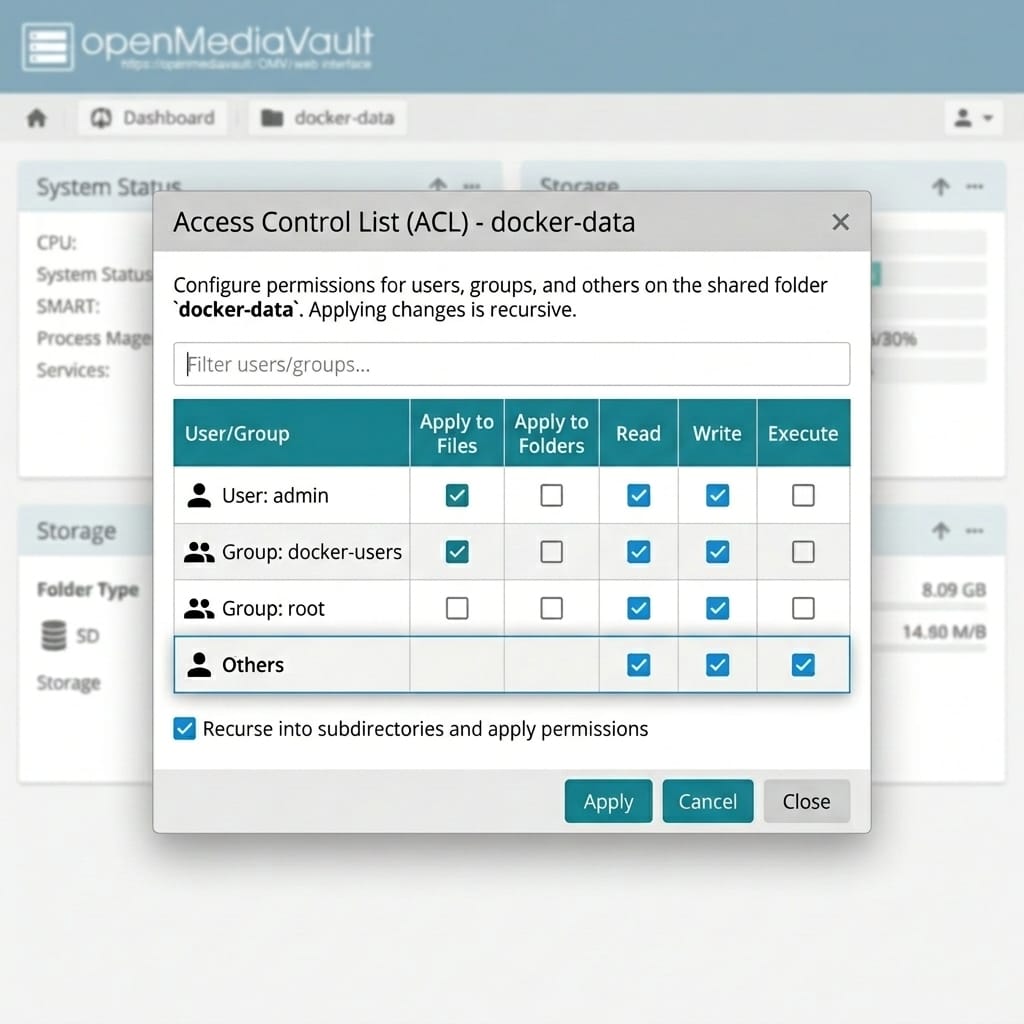
On my OpenMediaVault NAS, I created a dedicated shared folder called zulu-docker-data.
The Permission Workaround
Because NFS uses IP-based access controls rather than username/passwords, file permissions must match across systems. To avoid ownership locking headaches (where a container writes a file on OMV under a UID that the ZuluServer client can't read), I configured the NFS share with all_squash:
all_squash,anonuid=1000,anongid=1000,async,insecure,no_subtree_check,rw
This maps all client read/write requests to UID/GID 1000 (which matches my primary devops user on ZuluServer).
The Gotcha: Because OMV's native filesystem (ext4) creates shared folders with standard permissions (775 owned by root:users), ZuluServer initially threw a Permission denied error. I resolved this in the OMV Web Console under the folder's ACL settings, explicitly granting Read/Write/Execute permissions to Others (allowing the squashed UID 1000 to write).
Mounting on the Client
On ZuluServer, I mapped the share permanently in /etc/fstab at /opt/docker-data/ using systemd-automount options to prevent the system from hanging if the NAS is offline during boot:
10.0.0.20:/export/zulu-docker-data /opt/docker-data nfs rw,noatime,rsize=8192,wsize=8192,tcp,timeo=14,intr,nofail,x-systemd.automount,x-systemd.device-timeout=15s 0 0
The Copy Hack: Using a Docker Container as Root
When it came time to copy the local configuration files to the NFS mount, standard copy commands threw permission errors:
cp: cannot open '/home/deploy/docker/files/appdata/config/dispatcharr/jwt' for reading: Permission denied
This happens because some containers run internally as root or other specialized system users, generating configuration files that my local deploy account didn't have read access to.
To solve this, I leveraged Docker itself. Since my client account was in the docker group, I could spin up a temporary container, mount both paths, and run the copy inside it.
Why this works:
- Bypassing Local Root Restrictions: Some configuration files inside
/home/deploy/docker/files/appdata/config/(such as thejwttokens or internal database settings) were created by containers running asroot(UID0) internally. Locally on ZuluServer, a standard unprivileged user account cannot read these files withoutsudo. - Avoiding the NFS Root Squash Trap: Running
sudo cplocally was not an option. Because the OMV NFS share is configured withall_squashtargeting UID/GID1000, the NFS server intercepts any client requests sent byroot(UID0) and maps them to the unprivilegeddeployuser. Ifdeploylacks read access to the local root-owned files on the client side, the copy command fails. - The Docker Workaround: By running a temporary
alpinecontainer, the local Docker daemon (which runs as host root) mounts both the local folder (/src-local) and the NFS share (/dst). The container's root account has full read access to the local files, enabling it to read everything. As it writes them to/dst, the NFS server squashes the files safely to UID/GID1000, resulting in a clean copy where all migrated files are owned by the correct unprivileged host account.
docker run --rm \
  -v /home/deploy/docker/files/appdata/config:/src-local \
  -v /opt/docker-data:/dst \
  alpine sh -c "cp -a /src-local/code-server /dst/ && \
                cp -a /src-local/cleanuparr /dst/ && \
                cp -a /src-local/dispatcharr /dst/ && \
                cp -a /src-local/huntarr /dst/ && \
                cp -a /src-local/flaresolverr /dst/ && \
                cp -a /src-local/homepage /dst/ && \
                cp -a /src-local/dashy /dst/ && \
                cp -a /src-local/iplayarr /dst/ && \
                cp -a /src-local/nzbget /dst/"
It worked flawlessly. Every file copied over, permissions were mapped, and all root-locked files were successfully transferred to the network share.
Updating GitOps Stacks
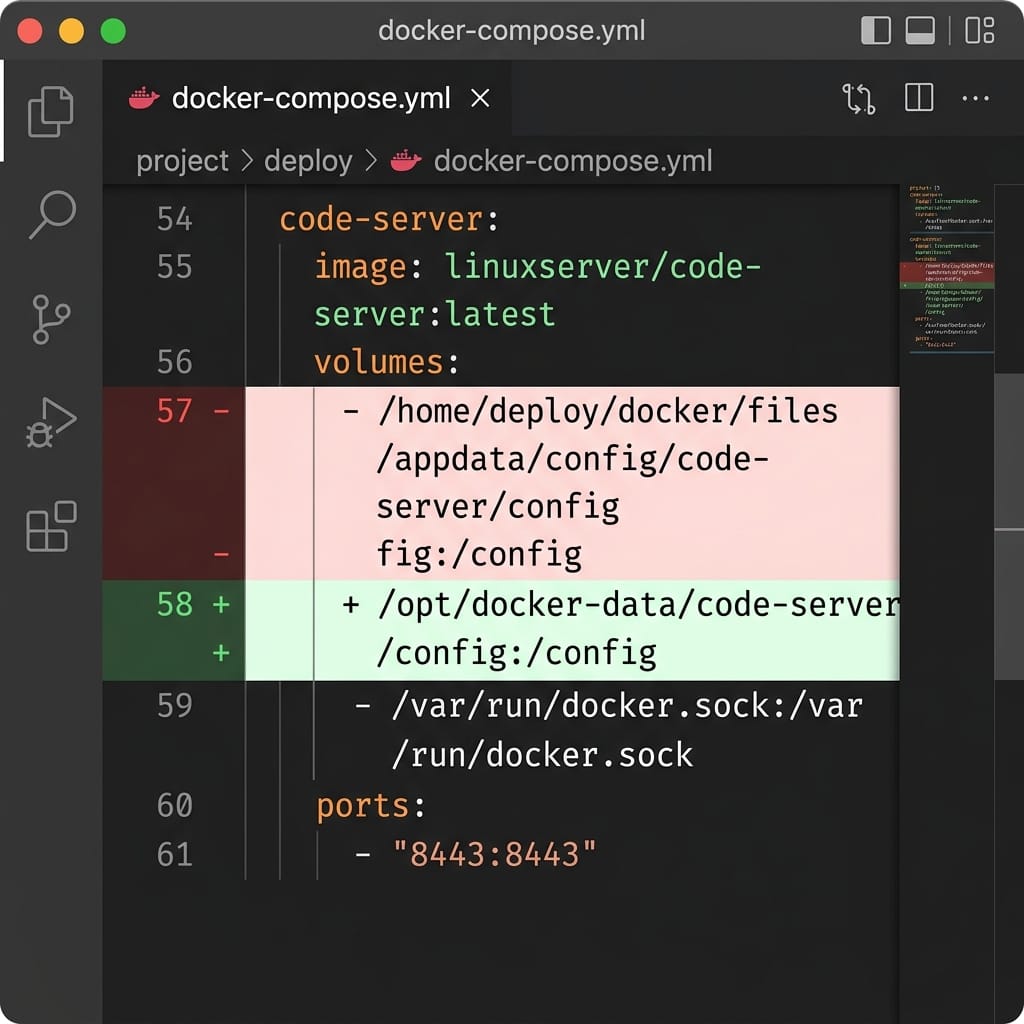
With the data successfully on /opt/docker-data, I stopped the services, updated my GitOps compose stacks, and ran docker compose up -d.
For example, code-server's volume map went from:
    volumes:
      - /home/deploy/docker/files/appdata/config/code-server/config:/config
to:
    volumes:
      - /opt/docker-data/code-server/config:/config
All 9 containers spun back up instantly. Checking the logs confirmed that they read their network configs, connected successfully, and started without errors. I committed the stack updates to Git and archived the old local directories to .bak folders on the host.
The Next Step: Backup Loops for the Databases
Now that 9 safe containers are completely stateless on ZuluServer, the final piece of the puzzle is managing the high-risk database containers that stayed local (Plex config, Uptime Kuma, Linkwarden, etc.).
To keep ZuluServer disposable without risking SQLite corruption, I am implementing nightly backup loops:
- A cron job script runs at 3:00 AM on ZuluServer.
- It briefly pauses the local database containers (or uses database dump utilities like
pg_dumpfor PostgreSQL) to ensure transactional consistency. - It compresses the databases and uploads the gzip tarball to
/opt/docker-data/backups/. - It restarts the containers.
If ZuluServer ever fails, my recovery workflow is simple: provision the VM via Terraform, run Ansible to mount the NFS shares, pull down the latest database dumps from /opt/docker-data/backups/, extract them to local storage, and spin up the stacks.
Decoupling state takes careful planning, but separating simple configs from high-write databases is the key to a fast, stable, and completely rebuildable homelab infrastructure.
Don't forget to explore the rest of our website as we build out more content. Stay tuned for more tutorials, tips, and tricks to help you make tech work for you.
If you want to stay up-to-date with regular updates, make sure to subscribe to our free mailing list.